May 26, 2013 at 1:01 AM (Homemade Hippie cleaning products, Make It Yourself, Non Toxic, Simple)
Tags: Detergent, DIY, easy, Essential oil, frugal, Home, homemade, housekeeping, Laundry, Laundry detergent, Non Toxic, Soap

This is the laundry soap that I used before I discovered soap nuts. See all about soap nuts HERE and other ways to use them besides laundry HERE. I was at my girlfriends house the other day and she was complaining about the high cost of laundry soap and all the chemical junk that it contains. I showed her how to whip up a batch of homemade laundry soap. Her cost: $0.83 cents! This does 60-64 loads of laundry. That is one penny per load baby!
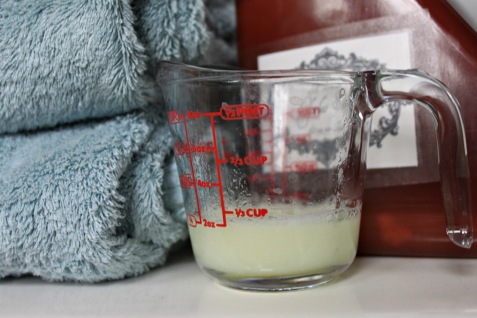
Homemade Liquid Laundry Soap
- 3 pints water (6 cups)
- 1/3 bar of Fels Naptha soap grated (we cheated and grated it in her food processor . ha!)
- 1/2 cup washing soda (not baking soda)
- 1/2 cup borax
- 1 Quart hot water (4 cups)
- A 2 gallon bucket with a tight-fitting lid (we used an old coconut oil bucket, if you’re really nifty you can funnel this into an old detergent bottle and nobody will even know you’re a cheap skate!)
- cold water to fill bucket
1. Mix Fels Naptha in a saucepan with 3 pints water, heat on low until dissolved. Stir in the washing soda and borax. Stir until thick and remove from heat.
2. In the 2 gallon bucket add 1 quart of hot water. Add soap mixture to the bucket and stir well.
3. Now fill the bucket with cold tap water (leaving room to stir).
4. Set bucket aside for 24 hours. Uncovered. It will turn into a gel.
5. Place lid on bucket and you’re ready to wash some clothes.
Use 1/3 to 1/2 cup per load. You can stir in any essential oils that you like, if you are a fan of scented laundry.
Related Articles:
What the heck is a Soap Nut?
Soap Nuts around the House (and on your head)
Homemade Hippie Orange Cleaner
Homemade Hippie Scouring Powder
Homemade Hippie All-Purpose Cleaner and Disinfectant
Homemade Hippie Dishwasher Detergent
Homemade Hippie Windex for 0.12 cents a bottle
ALL Homemade Hippie Recipes
12 Comments
April 11, 2013 at 12:01 AM (Almost Free, Homemade Hippie Beauty Products, Make It Yourself, Non Toxic, Simple, Under $1.00)
Tags: beauty, Coconut oil, DIY, easy, Essential oil, frugal, hair mask, hair oil, hair products, herbal medicine, hippie, homemade, homemade beauty products, hot oil treatment, Non Toxic, Simple
Many of my Homemade Hippie fans know that I am the ultimate cheap skate. I was standing in the grocery store aisle reading labels (yes I am a Label Nazi, and you should be too!) and after much searching, finally found a deep conditioning hair mask that didn’t list the first two ingredients as water and alcohol. It has such yummy ingredients as coconut oil, olive oil, keratin, aloe vera gel and carrot seed oil. I then turned the bottle over and saw the price tag. $12.59! This bottle claims to treat your hair 2 times and contained 2 ounces of hair oil. I don’t know about you, but smoothing my split ends isn’t worth $6.29 per shower. So of course I decided to make it myself.
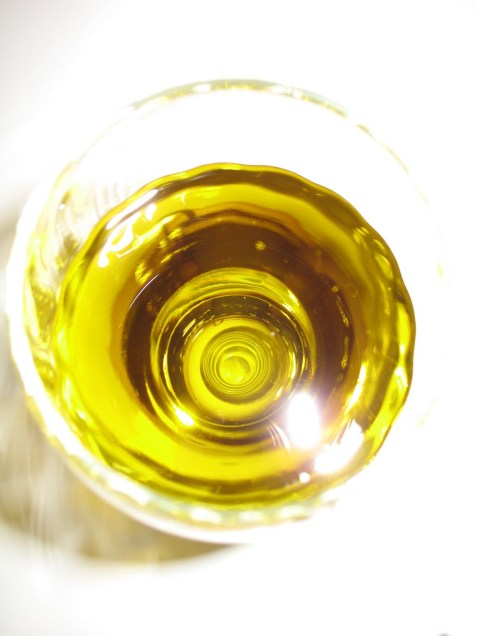
First of all, to be very cheap you’re going to want to use what you have on hand. Just about any type of oil will nourish and moisturize your hair. If you want to be very specific:
OILS
- Avocado Oil- good for very dry or very frizzy hair
- Coconut Oil- Good for all hair types, and works well for dandruff
- Castor Oil- Good for those with oily hair or scalp
- Sesame Oil- Good for thinning hair
- Jojoba Oil- Good for oily hair or scalp, a very light oil and easy to wash out
- Neem Oil-Excellent for dandruff
- Argan, Almond, Apricot- Good for all hair, but expensive to be washing down your shower drain
Other Ingredients:
Essential Oils
Herbs
Aloe Vera Gel- Clarifies and strengthens
Eggs- A source of serious protein and keratin, things that hair is made of
With all of this in mind, make up your own personal oil blend. In a pinch grab whatever natural oils you have at home already and mix with a couple of raw eggs.
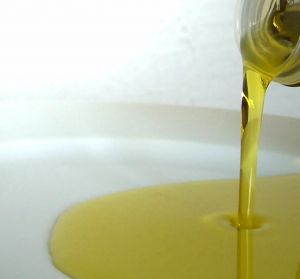
Homemade Hippie Hot Hair Oil
This was compiled with ingredients that I already had, and for my specific type of hair. I have red hair that is very fine and thin and does tend to dry out easily.
- 2 Tbsp Avocado Oil
- 2 Tbsp Coconut Oil
- 2 Tbsp Aloe Vera Gel
- 2 raw eggs
- In a small double boiler or saucepan gently heat oils and aloe, stirring to mix and melt. Remove from heat and whip in the eggs with a fork.
- Wet your hair in the sink and apply warm oil to wet hair. (you can apply to dry hair if you like. I just feel like it absorbs better when my hair is wet)
- Run a bath towel or large kitchen towel under very hot tap water. Wring out towel and wrap it around your head.
- Sit around with your oily head and watch the Lifetime Movie Network or check out old Homemade Hippie Posts (below) and plan your next concoction.
- I don’t time this, but it’s best to leave the oil on your hair as long as you can. 30 minutes minimum.
- You can rewarm the towel under hot water if you wish.
- Wash your hair as you normally would. You will probably need to wash it twice to remove all of the oil.

MY COST:
2 TBSP Avocado Oil $1.33
2 Tablespoons Coconut Oil $0.81 cents
2 Tablespoons Coconut Oil $.047 cents
2 Eggs $0.00 The beauty of dating a chicken farmer If you aren’t so lucky, you can add approximately $0.25 to your total
For 1 hair treatment this cost me $2.61 and used 3 ounces of oil. That is $0.87 cents per ounce!

Calling all Cheap Skates
Related Posts:
Homemade Hippie Lip Balm
Homemade Hippie Hair Spray
Homemade Hippie Body Wash
Homemade Hippie Bug Spray
Homemade Hippie Tooth Paste
Homemade Hippie Orange Cleaner
Homemade Hippie Scouring Powder
Homemade Hippie Dishwashing Powder
Homemade Hippie Wrinkle Cream & Eye Cream
Homemade Hippie All Purpose Cleaning Spray
Homemade Hippie Windex for $0.12
Homemade Hippie Mouthwash
Homemade Hippie Face Wash
Homemade Hippie Simple Hand Lotion
A COMPLETE LIST OF HOMEMADE HIPPIE RECIPES
3 Comments
April 8, 2013 at 12:01 AM (Beverages, Fast, Recipes, Simple, Sugar Free, Whats for Breakfast?)
Tags: cancer, candida cleanse, candida diet, Coconut oil, Cook, cooking, diet, DIY, easy, Easy Recipes, food, Frugal Recipes, fungus, Health, kitchen, paleo, real food, smoothie

Breakfast is tricky for me. I am not hungry in the morning! I know it’s supposed to be this big healthy meal full of protein and fabulous vitamins to start the day off, but quite frankly at 7am I am too tired to chew. I also love to sleep! So I wake up at the last possible second. If I am to eat a ‘proper’ breakfast, I would have to wake up earlier in order to prepare it. Realistically, in the actual life of me…..not going to happen.
So I have resorted over the years to either a piece of fruit in the car while I’m driving to work, or a smoothie. Since I am erradicating all Candida from my life for this experiement, I can no long have fruit sugars. According to the experts I’m allowed to eat only the following fruits:
- Berries
- Grapefruit
- Lemon
- Lime
- Green Apples
- Avocado
- Fresh Coconut
Part of me is tempted just to throw every one of those fruits into a blender and call that a smoothie, but that would be WAY too much fruit sugar all at once. So I add as much protein as I can. I have noticed that this keeps me full for a very long time. I normally take a lunch hour around 1pm, and this satisfies until then for sure!
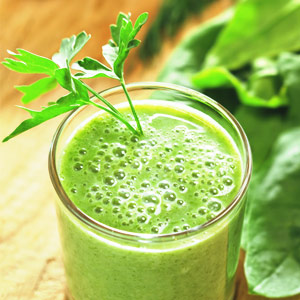
Green Apple Smoothie
1 Large Green Apple- seeded & cored (if your blender is a little on the wimpy side you may want to peel it as well)
5 medium carrots
1 cup homemade yogurt
2 raw eggs*
1 cup greens (not Kale, not making that mistake again)
1 Tbsp coconut oil
Directions:
- Put it all in the blender, duh
- Pour it in a glass and get in the car and go to work! Hurry up you have 1 minute and 8 seconds to be out the door!
- * I wouldn’t consume the average commerically farmed egg raw. That shit will kill you. I am lucky to be madly in love with a chicken farmer, who grows me organic, completely free-range and soy-free eggs (why soy free you ask? READ THIS). They are bright orange-yolked bundles of goodness, full of Omega 3’s and all 23 essential amino acids. Really, the perfect food. You should find yourself such a source and eat raw eggs until the cows come home. Or the chickens in this case.
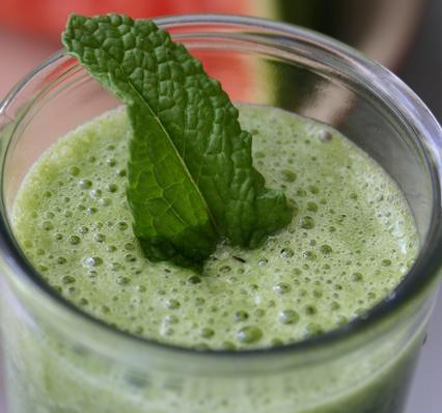 What does it taste like you ask? It tastes mildly sweet and very creamy with a bit of tartness from the yogurt and the apple. You could probably sweeten it with Stevia or something, but I like it just fine as is. But I’m weird so…
Related Articles:
Is Cancer a Fungus?
Is Candida Overgrowth a Real Problem?
The Easiest Cancer Cure in the World?
Heat Free Homeade Yogurt!
How to Make Yogurt in the Crock Pot
Real Food Recipes
3 Comments
April 1, 2013 at 3:38 PM (Health, Herbal Medicine, Non Toxic, Simple, Your Journey to Health)
Tags: alternative medicine, breast cancer, cancer, fungi, fungus, gluten free, grain free, Health, herbal medicine, medicine, Nutrition, real food, sugar free
I just recently read this article from www.knowthecause.com. I have long been a fan of his podcasts. If you haven’t heard of Doug Kaufman, check out his information. It definitely makes you think about cancer in a whole different way. Tomorrow I will share my protocol for avoiding cancer and fungi in general. It’s ALOT easier than you think!
Written by Know The Cause
| I was diagnosed with aggressive, infiltrating stage III breast cancer in 2002 when I was just 47 years old, with six of my eight children still at home. The youngest ones were 5, 8, and 10. I was 10 years younger than my maternal aunt was when she was diagnosed. |
|
 |
| The traditional route of treatment was offered to me. When breast cancer is diagnosed, you’re made to feel like you have to make a decision yesterday, and before you can blink, you’re scheduled for a double mastectomy (with reconstruction) and shuttled back and forth between oncologists, tests, and scans. Your world has been turned upside down, and while spinning out of control, you’re supposed to make informed, well-researched decisions. You do what you’re told. You follow the pack. You choose the known, I’m ashamed to say.
Hundreds of thousands of dollars, 77 linear inches of incisions, AND seven drain tubes later, I was sporting reconstructed breasts. I lived in a motorized recliner for six weeks, and I couldn’t lift anything heavier than 1/2 gallon of milk. I couldn’t walk upright for 13 weeks. Huge doses of antibiotics were administered routinely. Powerful narcotics kept pain managed and allowed me asleep. It took a terrible toll on my immune system.
I had another surgery to install the port: more anesthesia, more drugs for pain. At this point, I was gearing up for the first round of Adriamycin and Cytoxin – every 21 days for almost six months, to be followed by Taxotere and possibly radiation. Gearing up means filling all the drugs to manage the side effects, signing all the paperwork acknowledging that you’ll not hold anyone liable for anything and agreeing that you understand that the result of treatment for your cancer may mean permanent heart, liver, lung, eye, and kidney damage. Hair can (and does) fall out, nails may be permanently misshapen, discolored, or never grow back… and on and on. This paperwork that signs away your life takes hours and is terrifying if you really listen and read. (Who really does under these circumstances? If one really did, one would bolt out of there!)
Chemotherapy ranks up there with the worst experiences of my life. Everything that could go wrong did, so through the continuing haze of nausea, constipation, injections for low white blood cell counts, I decided that I would choose a shorter life expectancy than to continue with this protocol. When begging my oncologist (and family doctor) for ideas on a lower dosage or alternative treatment, I was told that this was the “gold standard” of breast cancer treatment. I was told that if I didn’t take it, I’d have two years to live. But I wanted to try something different, and I asked if the oncologist would at least follow my progress and perform routine tumor markers. He dismissed me.
Enter the “anti-fungal” approach! Through a series of people, I was introduced to the work of Doug Kaufmann. I devoured The Germ that Causes Cancer, read with my finger in the glossary. But, I saw myself in the pages of the anti-fungal questionnaire (constant sinus infections, excessive antibiotic use, high carb consumption, exposure to environmental mold, weight issues, major stress, fatigue), and I embraced the whole theory as making complete sense. I saw the duplicity in the medical/pharmaceutical industry. I saw the money trail. I saw the science behind mycology. I saw the chain of sickness caused by fungus, treat the fungus with antibiotics, another illness, treat with antibiotics… I GOT IT ALL!
I actually found the program to be really do-able and completely affordable (most OTC anti-fungals are less than $12 monthly). The food was plentiful and tasty. There was a learning curve for the first weeks, but really, it was super easy. I never felt better! Though in my late forties, I felt like I was in my twenties; my skin and hair were healthy, and I went my merry way optimistically. My tumor markers remained low and all x-rays clear.
Over the long haul though, as one gets further removed from the “scare”, old habits creep back in and improper responses to stress return. And in my case, another mold exposure problem ensued; in November 2013, ten years later, I was diagnosed with Stage IV breast cancer metastasis to my bones. I was told there was no cure and that prayer was my best hope.
I immediately returned to what I knew to do – the anti-fungal diet, OTC anti-fungals, and several rounds of prescription anti-fungals. All were inexpensive and easy. Three and a half months later, I was pronounced “in complete remission” with “no evidence of avid malignancy”.
I keep asking, “Really? Really! Can it be this quick, this cheap, this easy?” Folks, it is! The cancer industry has us snookered! I’m walking proof! |
13 Comments
May 28, 2012 at 1:01 AM (Recipes, Simple, Whats for Dinner?)
Tags: Bake, baking, casserole, Cook, cooking, Easy Recipes, fish, food, Frugal Recipes, Health, Home, homemade, kitchen, morel, Nutrition, real food, sea food, trout

Any fish will work for this recipe. Just pick your favorite fillet and go with it. We just happened to have a huge lake trout in the freezer, so this is what I used. It is finally mushroom season, and morels are my favorite. Time to stock up!
Lake Trout with Morels
1 lb fish fillets 1/2 to 3/4 thick
2 Tbsp butter
1 1/2 cups fresh mushrooms, sliced
1/3 cup green onion, sliced
Sea salt
1 tsp fresh thyme, or 1/4 tsp dry thyme
- Thaw fish if frozen. Pat dry and place in baking dish. Sprinkle with sea salt.
- In a saucepan melt butter and add mushrooms, onions and thyme. Cook until tender.
- Pour over fish and bake in 450 degree oven for 12-18 minutes. Fish should flake easily with a fork when done.
 If you are lucky enough to have a surplus of morels this year there are many ways to preserve them. I have tried just about everything, and several methods work.
1. I thoroughly rinse the mushrooms in cold water. Then sauté in butter for no longer than 3 minutes. Let cool and place in a zip lock baggie with juices from pan. When you are ready to eat, cut off the plastic bag and place the whole frozen block in a skillet. Cover and cook on low. Tastes just like fresh, with a slight difference in firmness and texture.
2. I have dried them on a string in the attic for a month, I have laid them on the oven rack and dried them at 160 degrees for about an hour. I have laid them on window screens out in the back yard until dry. I have never owned a dehydrator, so that’s the only method I haven’t used. Of everything I’ve tried, threading them onto a string (like a little mini-clothes line) was by far the best. When rehydrated the taste and texture was exactly the same as fresh out of the ground. Maybe because no heat is used?
3. I have washed and drained the mushrooms so they are almost dry. Then laid them on a cookie sheet and placed them in the freezer until solid. Pack into bags and vacuüm seal. This method changed the texture a bit, but the flavor was the same.
4. My least favorite method was packing a mason jar (or other freezer container) with mushrooms, covering that with cold water and freezing. They would be ok for soup, but the texture was too mushy for my tastes. And a lot of the flavor gets dumped out with the water after thawing.
Happy mushroom hunting!

3 Comments
May 15, 2012 at 1:01 AM (Fast, Make It Yourself, Recipes, Simple)
Tags: Butter, Coconut oil, Cook, easy, Easy Recipes, food, frugal, Frugal Recipes, Home, homemade, how to, kitchen, Nutrition, Popcorn, real food, recipe, Simple, tutorials
This is almost too easy to post about, but it’s one of our favorite snacks, so I thought I’d share. You can use coconut oil, or butter or a mixture of the two. I like a mixture, but that is totally up to your taste buds! This is a large recipe, because for some reason this doesn’t go stale like other recipes I’ve tried. I pack a bag in my lunch and eat it cold the next day. If you want just a small, easy snack 2 Tbsp of dry popcorn kernels make 1 Quart of popcorn.
Coconut Oil Popcorn
makes about 2 1/2 quarts (10 cups)
1/3 cup organic popcorn kernels
3 Tbsp coconut oil
2 Tbsp grass-fed butter
salt to taste
I use a very heavy bottomed, stainless steel stock pot with a lid for this recipe. I think just about any heavy pot will do (including heave frying pans).
Place coconut oil, popcorn kernels and butter in pot. Turn heat to medium-high and place lid on pot. Every 10 seconds or so shake the pot to avoid burnt popcorn. Once the popcorn starts to pop, you can stop shaking. There will be a fast burst of popping, after that turn off the heat and let it finish popping. Remove lid and add salt to taste.

butter, coconut oil and organic popcorn in pot. Medium high heat.
I have made this many times and have never had burnt popcorn or un-popped kernels in the bottom of the pot. We eat a lot right away, and then store the left overs in sandwich bags for lunch or snacks.

Empty pot, no burned or un-popped kernels.
Other popcorn flavor ideas that I plan to try:
Grated Parmesan cheese
Italian seasonings (basic, oregano, parsley)
Salt & Vinegar
Lemon pepper
Tabasco sauce
Celery salt & Dill
Garlic Butter
Homemade taco seasoning
What are your ideas?
22 Comments
May 12, 2012 at 1:01 AM (Buying in Bulk, Recipes, Simple, Whats for Dinner?)
Tags: Bake, Baked beans, baking, casserole, Cook, cooking, crock pot, easy, Easy Recipes, food, frugal, Frugal Recipes, Health, Home, homemade, kitchen, Nutrition, Oven, real food, recipe, Recipes, Simple, Slow cooker

Baked Beans in the Crock Pot
This makes 1 quart of beans
1 cup dry kidney, navy or pinto beans soaked (see below)
2 sweet, yellow onions, chopped fine
1/2 cup raw maple syrup (or brown sugar)
1/4 cup molasses
1/3 cup organic or homemade ketchup
1 tsp salt
1 1/2 tsp dry mustard powder
1/2 tsp pepper
1/2 lb bacon (from pasture raised pigs)
To soak the beans: Place beans in large bowl or pot, cover with 1 quart of very warm water (110-130 degrees). Soak for 8-24 hours. I put mine in the oven with the pilot light and oven light on, to keep them toasty. They next day, drain the beans and rinse.
Place beans and all other ingredients EXCEPT SALT in the crockpot, laying the bacon across the top. Adding salt to dry beans, keeps them from getting soft. Always add salt to beans after cooking. Cook on low for 4-6 hours.

These are very good and very filling. I serve them with fresh cornbread right out of the oven and we usually eat way too much. This recipe freezes and reheats very well. I have made a quadruple batch before and froze it in individual containers (back when I had a chest freezer, geez I miss that!).
3 Comments
May 11, 2012 at 1:01 AM (Almost Free, Fast, Make It Yourself, Recipes, Simple, Under $1.00)
Tags: Bake, baking, bread, Cook, cooking, Crouton, DIY, easy, Easy Recipes, food, frugal, Frugal Recipes, housekeeping, kitchen, Nutrition, real food, recipe, Recipes, Salad, Simple, sourdough

Salad season is a lot of fun for me this year. I am having a blast coming up with all sorts of salad dressing and fun creations. But what is a salad without a crunchy, salty, buttery crouton? I had Rob time me, and these took exactly 3 minutes and 4 seconds to prepare, and 9 minutes to bake in the oven. Now, that’s what I call fast food! (and a great use for stale bread).
Homemade Garlic Butter Croutons
1 Tbsp Butter
2 Tbsp Olive Oil
2 Cloves garlic, crushed
salt and pepper
Dash of basil, thyme or parsley for color (totally optional)
4 slices bread, cubed
Preheat the oven to 425. Heat butter, olive oil and garlic in a skillet. Cube some stale bread (I used whole wheat sourdough, but whatever you have around will work) and throw it in the pan. Toss the bread around and stir to coat. Sprinkle with salt and pepper. Spread onto a cookie sheet and bake for 9-10 minutes. Let them cool completely and store in an airtight container. They will keep for 2-3 months.

3 Comments
May 7, 2012 at 9:01 AM (Beverages, Ferments, Health, Herbal Medicine, How To, Make It Yourself, Non Toxic, Recipes, Simple, Sugar Free, Your Journey to Health)
Tags: alternative medicine, cooking, DIY, food, Frugal Recipes, Health, homemade, Kombucha, Kombucha Scoby, paleo, real food, SCOBY, Tea, weston a price

Rob and I quit caffeine about 3 months ago (for these 50 reasons). So I put my Kombucha Scoby to sleep until I could figure out a way to make decaffeinated Kombucha. There is much controversy about how much caffeine is left in the finished batch of tea, and I wasn’t about to take a chance on getting hooked on the stuff again. Some people say that all of the caffeine is consumed by the bacteria in the Kombucha. Some people say 50%…I have even heard that none of the caffeine is consumed by the bacteria, and that Kombucha is full of caffeine. According to Energy Fiend an 8 oz glass of Kombucha contains approximately 24 mg of caffeine. What to believe? Honestly, I couldn’t find any hard research that convinced me either way, so I decided to make my own decaf tea and test it out myself.
First of all, I use regular old Lipton black tea bags and plain white table sugar to make Kombucha. Doesn’t sound like a very healthy beverage right? I have called the Lipton company twice, and the assured me that they have never sprayed their fields, or used any preservatives in their tea. Tea is naturally very resistant to pests and disease so there is no need. You can use organic tea if you like, or green tea. According to the experts you cannot use herbal or flavored teas. Herbal tea contains no caffeine, which the Scoby needs. Flavored teas contain oils and additives that harm the Scoby.
As far as the sugar is concerned, the bacteria DO eat that. There is very little sugar left in the finished batch of Kombucha, and this I have tested out plenty of times. If you don’t have white sugar around (I buy it specifically for making Kombucha) you can use sucanat, rapadura, or evaporated cane juice. Do not use honey, as it contains its own colony of bacteria and yeasts that compete with the Kombucha.

To remove caffeine from a regular black tea bag:
- Place 5-6 tea bags in an empty bowl or coffee mug
- Boil 1 gallon of water for Kombucha
- Ladle out 1 cup of water and pour it over the tea bags
- Steep for 30-45 seconds
- Remove the tea bags, and place them in the large 1 gallon pot of hot water
- Steep until dark. Adding 1 cup sugar
- Make Kombucha as you normally would.
Up to 80 percent of the caffeine is released in the first infusion of water so only minimal amounts will remain when you add water the second time. This method eliminates very little of the tea’s flavor and aroma. I decided to go with this method, because I believe that the Kombucha Scoby needs a small amount of caffeine to grow and thrive properly. I am hoping that it eats up the remaining 20% of caffeine!
I have been making it this way for 3 weeks now. When the first batch was done, I waited until 30 minutes before bedtime and drank 16 ounces of Kombucha. I am normally very sensitive to caffeine, even when I was drinking large amounts of coffee, I always had to cut myself off by 3pm or I’d be awake all night. I noticed no sleep disturbances after drinking the Kombucha. I know that is not very scientific, but at this point anecdotal evidence is all I’ve got 🙂
So if the 24 mg in an 8 oz glass statistic from above is correct than an 8 oz glass of naturally decaffeinated Kombucha should contain around 4.8 milligrams of caffeine.
Has anyone else made it this way? Have you been able to find any solid research on the caffeine needs of a Kombucha Scoby? Why isn’t anyone studying this stuff?

Cherry Kombucha Soda
P.S Sometimes we like flavored Kombucha Soda in the summer. I wait until the Kombucha is all done fermenting for 7 days. I line up several glass bottles (I had people from work save me their old glass, juice bottles) and I add 2 ounces of juice to each bottle. Fill each bottle with Kombucha and screw the lids on tight. Wait 24 hours and then put them all in the fridge. Very bubbly and delicious! Try grape, pomegranate, cherry or pineapple juice. This would be an excellent way to shake a soda pop addiction!
9 Comments
May 6, 2012 at 1:01 AM (Homemade Condiments, Make It Yourself, Recipes, Simple, Under $1.00)
Tags: Cocktail sauce, cooking, DIY, Easy Recipes, Frugal Recipes, Health, Horseradish, Nutrition, real food, sea food, Simple
 We do love our shrimp around here. We have actually just had shrimp with cocktail sauce and a few bits of crackers and cheese for dinner before. Delicious.
Cocktail Sauce
1 cup ketchup (i actually still buy this from the store, because we hardly ever use it)
1 Tbsp horseradish, pureed in the food processor
1 tsp chili powder
1 Tbsp lemon or lime juice
1 tsp homemade Worcestershire sauce
1/4 tsp sea salt
1/4 tsp fresh black pepper
Mix all ingredients and keep in an airtight jar in the fridge. Keeps for 2-3 weeks. This also freezes very well. Rob loves his really spicy, so I usually purée a whole piece of horseradish, so he can add more to his plate.

To Prepare Horseradish
Wash and peel the root with a veggie peeler
Cut into chunks
Place in food processor and add 1 Tbsp of water. Puree (protect your eyes!) and add 1 Tbsp white vinegar and a dash of salt. Add more water if you like it thinner. This will keep for 30 days in the refrigerator. It also freezes very well.
 A word about shrimp. Well, a few words….
#1 Choice: Wild Caught off the coast of the Pacific Northwest or the Northeast coasts of the USA and Canada, using live traps (not trawlers). Our favorites are Bay Shrimp, Cocktail Shrimp, Northern Shrimp, Pink Shrimp and Rock Shrimp. They are slightly more expensive, but the taste is worth it! And you are supporting fisherman who believe in treating the animal, and the ocean with respect. Instead of big trawling boats, these people use old-fashioned live traps and no other fish are harmed or killed in the process. A few good sources are U.S Wellness Meats, Fishhawk Fisheries, Hallmark Fisheries and Pacific Seafood Group Inc.
#2 Choice: Wild Caught off the coast of the Pacific Northwest or Northeast, using trawling methods (very wasteful, all the other fish caught in the net are thrown out)
#3 Choice: Organically farmed in the USA (strict regulations and pretty close nutritionally)
#4 Choice: Wild Caught off the Gulf of Mexico. They say the shrimp are safe to eat after the oil spills, but I’m still not comfortable with it.
Avoid at all costs: Any seafood farmed in Asia or Latin America. They have no regulations and use very complex chemical cocktails, containing many pesticides and antibiotics. They are also doing much harm to the surrounding environment using devastating farming practices. Unfortunately 90% of shrimp sold in the USA comes from these sub-standard shrimp farms. Red Lobster endless shrimp days anyone?
Shrimp season is from April through October, so buy high-quality shrimp in bulk during that time to save money.
10 Comments
« Older entries


