Breakfast is tricky for me. I am not hungry in the morning! I know it’s supposed to be this big healthy meal full of protein and fabulous vitamins to start the day off, but quite frankly at 7am I am too tired to chew. I also love to sleep! So I wake up at the last possible second. If I am to eat a ‘proper’ breakfast, I would have to wake up earlier in order to prepare it. Realistically, in the actual life of me…..not going to happen.
So I have resorted over the years to either a piece of fruit in the car while I’m driving to work, or a smoothie. Since I am erradicating all Candida from my life for this experiement, I can no long have fruit sugars. According to the experts I’m allowed to eat only the following fruits:
Berries
Grapefruit
Lemon
Lime
Green Apples
Avocado
Fresh Coconut
Part of me is tempted just to throw every one of those fruits into a blender and call that a smoothie, but that would be WAY too much fruit sugar all at once. So I add as much protein as I can. I have noticed that this keeps me full for a very long time. I normally take a lunch hour around 1pm, and this satisfies until then for sure!
Green Apple Smoothie
1 Large Green Apple- seeded & cored (if your blender is a little on the wimpy side you may want to peel it as well)
1 cup greens (not Kale, not making that mistake again)
1 Tbsp coconut oil
Directions:
Put it all in the blender, duh
Pour it in a glass and get in the car and go to work! Hurry up you have 1 minute and 8 seconds to be out the door!
* I wouldn’t consume the average commerically farmed egg raw. That shit will kill you. I am lucky to be madly in love with a chicken farmer, who grows me organic, completely free-range and soy-free eggs (why soy free you ask? READ THIS). They are bright orange-yolked bundles of goodness, full of Omega 3’s and all 23 essential amino acids. Really, the perfect food. You should find yourself such a source and eat raw eggs until the cows come home. Or the chickens in this case.
What does it taste like you ask? It tastes mildly sweet and very creamy with a bit of tartness from the yogurt and the apple. You could probably sweeten it with Stevia or something, but I like it just fine as is. But I’m weird so…
So I have decided that I’m going to give Gary Kaufmans “Phase One” diet a try and see what happens. I am going to follow it to the letter, including all of the anti-fungal herbs and supplements that he recommends in his books. And you get to follow along on my journey of pain and suffering whether you like it or not. If have no idea what I’m talking about READ THIS first.
My Symptoms to Start:
Constantly and wildly fluctuating hormone levels
Hair Loss
Sinus congestion
Alternating Anxiety and Depression (are we having fun yet?)
Constipation
Brain Fog
Bloated Abdomen
Fierce Chocolate Cravings
We are about to find out if any of this is caused by a systemic fungal infection or if I am just a hypochondriac 🙂
The Diet:
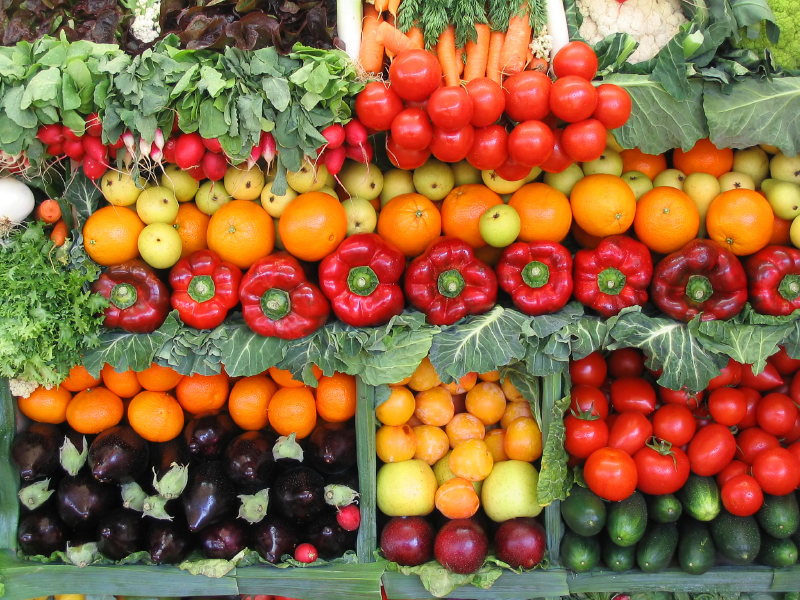
Eat ONLY the Following Foods
Meats:
Beef, Fish, Poultry, Lamb, Turkey, Pork
Nuts:
Raw nuts, including pecans, almonds, walnuts, cashews, and pumpkin seeds. Stored Nuts tend to gather mold, so be careful! No Peanuts and No Pistachio’s
Vegetables:
Most fresh, unblemished vegetables and freshly made vegetable juice. (avoid mushrooms, corn, and potatoes)
Beverages:
Bottled or filtered water, non-fruity herbal teas, stevia sweetened fresh lemonade or limeade, freshly squeezed carrot juice.
Fruits:
Berries, grapefruit, lemon, lime, green apples, avocado, fresh coconut
Dairy:
Organic butter, organic plain yogurt, ( use the following very sparingly) cream cheese, unsweetened whipping cream, real sour cream
“This diet minimizes fungal food, because it minimizes sugars that fungi require in order to grow. Ask your doctor about experimenting with this diet for 30 days and monitor your results. Many people keep a dietary log each day and share this with their doctor upon their next visit. Often, people begin to challenge this diet, wanting back some of the foods they miss, after achieving good results within a month or two. Most find that their symptoms begin coming back as they go back to their regular diets. This indicates that the fungi were successfully starved, but perhaps not eradicated. Many people, after reading our recipe books, realize that there are hundreds of wholesome and delicious recipes on this phase one diet. With their symptoms much better and their diets now getting more exciting, this diet becomes the genesis of their health program.”
Ok Doug, we’ll see! I’ll share my arsenal of anti-fungal drugs and start on new recipes tomorrow. I’m scared! Did you notice the complete lack of cookies on this program? No cookies! Holy Crap! Wish me luck.
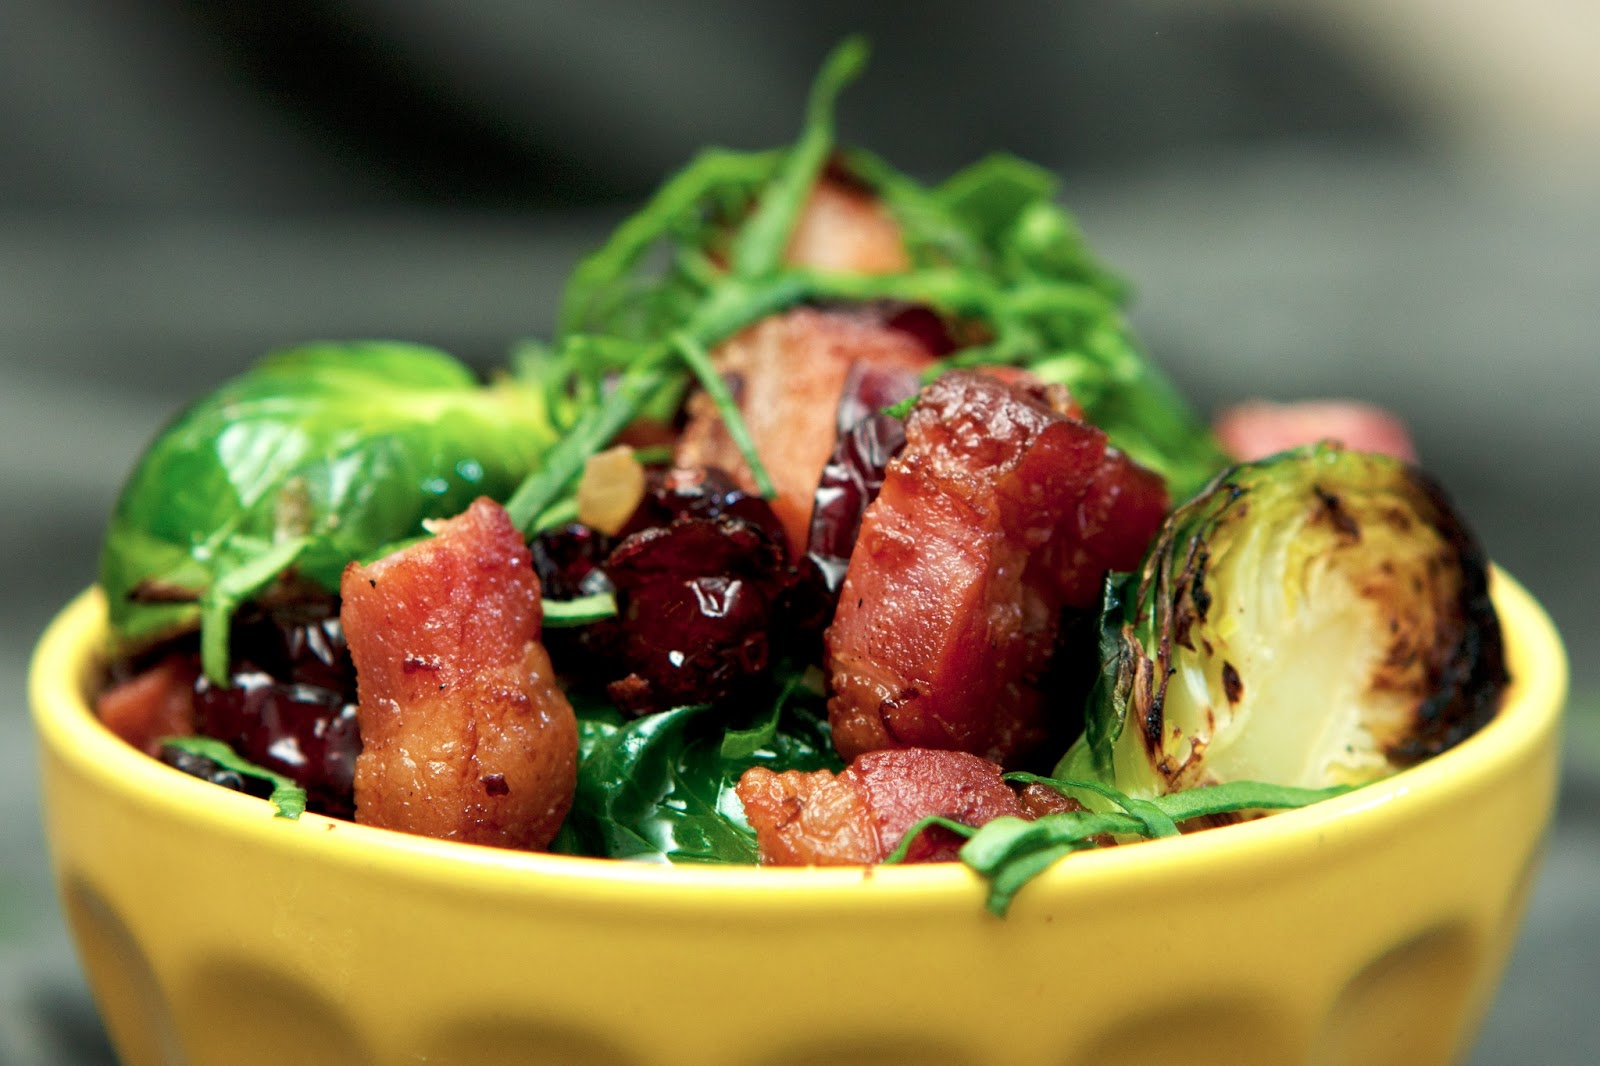
This recipe is very simple, but full of flavor. I love the saltiness of the bacon, the sweetness of the raisins and the bitter brussels sprouts all mixed together. A fabulous side dish!
I love recipes that can be placed on the grill and left alone for hours. This recipe is one of my favorites. Resulting in a sweet and spicey, very tender and juicy brisket. Sliced thin, it is barbeque at it’s finest! If you have a freezer full of venison or other wild game, this works great with a big thick backstrap or steak as well.
Tender Grilled Brisket
6 cups mesquite wood chips
1 4-5 lb beef brisket
1 Tbsp coconut oil
Paprika
Coarse sea salt
Black pepper
Red pepper flakes
Thyme
Before grilling, soak wood chips in a bucket of water.
Brush brisket with oil and sprinkle with all spices. I never measure. Rub spices into meat.
Drain wood chips and light charcoal in grill. Place 1 large handful of wood chips over charcoal.
Place brisket on grill. Cook 3 to 4 hours, adding another handful of wood chips every 30 minutes or so.
Remember for extra tender meat, never pierce the meat with a fork. Use tongs!
After meat is cooked, brush with homemade barbeque sauce and serve hot.
Mesquite Wood Chips
For a spicy Barbeque Sauce you can try my usual or this new one I’ve been playing with:
Hot and Sweet BBQ Sauce
1/2 cup onion, chopped
6 fresh jalepeno chile peppers, seeded and chopped
In saucepan heat oil and saute onion, pepper and garlic. Stir in all remaining ingredients and bring to a boil. Reduce heat and simmer 10 minutes. Makes 3 cups.
This is great with a basket of grilled fresh veggies, corn on the cob or green salad. The leftovers are excellent as a sandwhich, and I also love it served hot over cornbread.
Any fish will work for this recipe. Just pick your favorite fillet and go with it. We just happened to have a huge lake trout in the freezer, so this is what I used. It is finally mushroom season, and morels are my favorite. Time to stock up!
Lake Trout with Morels
1 lb fish fillets 1/2 to 3/4 thick
2 Tbsp butter
1 1/2 cups fresh mushrooms, sliced
1/3 cup green onion, sliced
Sea salt
1 tsp fresh thyme, or 1/4 tsp dry thyme
Thaw fish if frozen. Pat dry and place in baking dish. Sprinkle with sea salt.
In a saucepan melt butter and add mushrooms, onions and thyme. Cook until tender.
Pour over fish and bake in 450 degree oven for 12-18 minutes. Fish should flake easily with a fork when done.
If you are lucky enough to have a surplus of morels this year there are many ways to preserve them. I have tried just about everything, and several methods work.
1. I thoroughly rinse the mushrooms in cold water. Then sauté in butter for no longer than 3 minutes. Let cool and place in a zip lock baggie with juices from pan. When you are ready to eat, cut off the plastic bag and place the whole frozen block in a skillet. Cover and cook on low. Tastes just like fresh, with a slight difference in firmness and texture.
2. I have dried them on a string in the attic for a month, I have laid them on the oven rack and dried them at 160 degrees for about an hour. I have laid them on window screens out in the back yard until dry. I have never owned a dehydrator, so that’s the only method I haven’t used. Of everything I’ve tried, threading them onto a string (like a little mini-clothes line) was by far the best. When rehydrated the taste and texture was exactly the same as fresh out of the ground. Maybe because no heat is used?
3. I have washed and drained the mushrooms so they are almost dry. Then laid them on a cookie sheet and placed them in the freezer until solid. Pack into bags and vacuüm seal. This method changed the texture a bit, but the flavor was the same.
4. My least favorite method was packing a mason jar (or other freezer container) with mushrooms, covering that with cold water and freezing. They would be ok for soup, but the texture was too mushy for my tastes. And a lot of the flavor gets dumped out with the water after thawing.
This is an easy make-ahead breakfast. You can mix it up the night before and then bake it the next morning. It also makes a fast and easy dinner.
Ham & Asparagus Strata
4 English muffins, torn into pieces
2 cups cooked ham
2 cups fresh asparagus, cut up
4-6 oz Gruyère cheese, cubed
5 eggs, beaten
1/3 cup sour cream
1 1/2 cups milk
2 Tbsp onion, finely chopped
1 Tbsp Dijon mustard
1/2 tsp fresh black pepper
Grease a 2 quart casserole dish. Spread half of the english muffin pieces on the bottom.
Top with ham, asparagus and cheese cubes
Top with remaining english muffin pieces
In a bowl, whisk together eggs, sour cream, milk, onion, mustard and pepper
Pour this mixture over casserole dish, coating everything evenly
Cover and chill for 2 to 24 hours
Bake, uncovered at 325 degrees for 60-65 minutes
There are a zillion variations on this recipe. I have replaced the ham with chicken before. I have used broccoli instead of asparagus. I have used swiss instead of Gruyère. Let your imagination go wild!
Salt has received a lot of press in past years. One minute it is absolutely essential to life, and the next it is giving you hypertension and trying to kill you.
Salt contains sodium, which is necessary for life. It also provides chloride, which produces acid necessary to digest protein. Chloride is also essential to proper brain growth and function. Salt contains magnesium, which is important for many, many functions and is a crucial, but often overlooked mineral. See my post about magnesium here. Salt is important for muscle contraction and expansion, nerve stimulation, and the proper functioning of the adrenal glands. As with any thing on earth, moderation is the key. The body needs 500 mg of sodium per day. Today the average person eats 6,000 to 10,000 mg of sodium per day!
Often contains corn sugar to make it more palatable
Sea Salt
Unrefined
Unheated
Extracted from ocean water by evaporation
High mineral content: potassium, calcium, magnesium, selenium, copper, iron, zinc, and manganese.
Contains zero additives
Contains microscopic plant life, which naturally contain iodine
Contains live enzymes, which aid in digestion
Portugese Sea Salt
I love sea salt, and find the highest quality that I can afford. By far the best tasting salt I’ve ever had is Selina Naturally Hawaiian Sea Salt. It happens to also be the sea salt with the #1 highest mineral content. So if you are looking for my top recommendation, that would be it. (around $24 lb)
Runner up: Celtic Brand Sea Salt, not quite as high in mineral content, but very delicious. ($11.00 lb)
Other high quality sea salts I like are Selina Naturally Portuguese Sea Salt ($8 lb) and Himalayan Sea Salt ($5 lb).
Most other brands I’ve seen marketed as natural sea salt, have such low mineral content that you might as well buy iodized table salt and not bother.
I love the way Jamie Oliver presents this information about Pink Slime. He does a great job! I had to share! I would urge you to check out his website.
It is grilling season, so it’s time to whip up my secret weapon. I have been adapting and changing this recipe for so many years that I don’t remember what I originally started with. All I remember is that I had a half used can of tomato paste in the fridge I was trying to get rid of, and this recipe was somehow born. I love that it has no sugar, but still tastes sweet and has this great spicy kick that goes well with just about any meat. I also really love the base of nourishing bone broth, which you can never have too much of. Tonight we’re grilling bone-in pork ribs from our local farmer with some cornbread. Mmmm, I’m getting hungry just thinking about it!
Heat butter/oil in sauce pan and sauté onion for 3-4 minutes until translucent. Add all remaining ingredients and bring to a boil. You can serve it just like this, but I like to boil it down to thicken it a while. I turn down the heat, cover the pan and let it simmer for 20 minutes or so. I also find the longer cooking time melds the flavors, and it turns out even more delicious.
I have used this sauce on every cut of pork, beef and chicken that I can think of. It is a great marinade, basting sauce, oven baking glaze and dipping sauce. If you are feeding young kids or someone who doesn’t like spicy food you may want to add the chili powder a little bit at a time and taste as you go.
If you want to make this even healthier, you could let it cool and add 2 tbsp of whey and leave it on the counter over night. Then you would have a sugar-free probiotic condiment.
This keeps for 3 weeks in the fridge, and also freezes very well. If you eat as much meat as we do, it won’t last you that long 🙂
This is almost too easy to post about, but it’s one of our favorite snacks, so I thought I’d share. You can use coconut oil, or butter or a mixture of the two. I like a mixture, but that is totally up to your taste buds! This is a large recipe, because for some reason this doesn’t go stale like other recipes I’ve tried. I pack a bag in my lunch and eat it cold the next day. If you want just a small, easy snack 2 Tbsp of dry popcorn kernels make 1 Quart of popcorn.
Coconut Oil Popcorn
makes about 2 1/2 quarts (10 cups)
1/3 cup organic popcorn kernels
3 Tbsp coconut oil
2 Tbsp grass-fed butter
salt to taste
I use a very heavy bottomed, stainless steel stock pot with a lid for this recipe. I think just about any heavy pot will do (including heave frying pans).
Place coconut oil, popcorn kernels and butter in pot. Turn heat to medium-high and place lid on pot. Every 10 seconds or so shake the pot to avoid burnt popcorn. Once the popcorn starts to pop, you can stop shaking. There will be a fast burst of popping, after that turn off the heat and let it finish popping. Remove lid and add salt to taste.
butter, coconut oil and organic popcorn in pot. Medium high heat.
I have made this many times and have never had burnt popcorn or un-popped kernels in the bottom of the pot. We eat a lot right away, and then store the left overs in sandwich bags for lunch or snacks.


 What does it taste like you ask? It tastes mildly sweet and very creamy with a bit of tartness from the yogurt and the apple. You could probably sweeten it with Stevia or something, but I like it just fine as is. But I’m weird so…