April 11, 2013 at 12:01 AM (Almost Free, Homemade Hippie Beauty Products, Make It Yourself, Non Toxic, Simple, Under $1.00)
Tags: beauty, Coconut oil, DIY, easy, Essential oil, frugal, hair mask, hair oil, hair products, herbal medicine, hippie, homemade, homemade beauty products, hot oil treatment, Non Toxic, Simple
Many of my Homemade Hippie fans know that I am the ultimate cheap skate. I was standing in the grocery store aisle reading labels (yes I am a Label Nazi, and you should be too!) and after much searching, finally found a deep conditioning hair mask that didn’t list the first two ingredients as water and alcohol. It has such yummy ingredients as coconut oil, olive oil, keratin, aloe vera gel and carrot seed oil. I then turned the bottle over and saw the price tag. $12.59! This bottle claims to treat your hair 2 times and contained 2 ounces of hair oil. I don’t know about you, but smoothing my split ends isn’t worth $6.29 per shower. So of course I decided to make it myself.
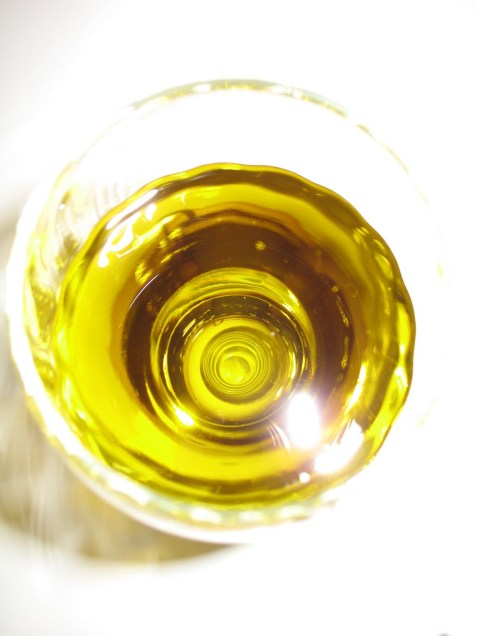
First of all, to be very cheap you’re going to want to use what you have on hand. Just about any type of oil will nourish and moisturize your hair. If you want to be very specific:
OILS
- Avocado Oil- good for very dry or very frizzy hair
- Coconut Oil- Good for all hair types, and works well for dandruff
- Castor Oil- Good for those with oily hair or scalp
- Sesame Oil- Good for thinning hair
- Jojoba Oil- Good for oily hair or scalp, a very light oil and easy to wash out
- Neem Oil-Excellent for dandruff
- Argan, Almond, Apricot- Good for all hair, but expensive to be washing down your shower drain
Other Ingredients:
Essential Oils
Herbs
Aloe Vera Gel- Clarifies and strengthens
Eggs- A source of serious protein and keratin, things that hair is made of
With all of this in mind, make up your own personal oil blend. In a pinch grab whatever natural oils you have at home already and mix with a couple of raw eggs.
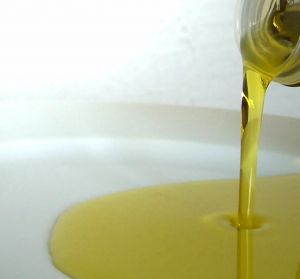
Homemade Hippie Hot Hair Oil
This was compiled with ingredients that I already had, and for my specific type of hair. I have red hair that is very fine and thin and does tend to dry out easily.
- 2 Tbsp Avocado Oil
- 2 Tbsp Coconut Oil
- 2 Tbsp Aloe Vera Gel
- 2 raw eggs
- In a small double boiler or saucepan gently heat oils and aloe, stirring to mix and melt. Remove from heat and whip in the eggs with a fork.
- Wet your hair in the sink and apply warm oil to wet hair. (you can apply to dry hair if you like. I just feel like it absorbs better when my hair is wet)
- Run a bath towel or large kitchen towel under very hot tap water. Wring out towel and wrap it around your head.
- Sit around with your oily head and watch the Lifetime Movie Network or check out old Homemade Hippie Posts (below) and plan your next concoction.
- I don’t time this, but it’s best to leave the oil on your hair as long as you can. 30 minutes minimum.
- You can rewarm the towel under hot water if you wish.
- Wash your hair as you normally would. You will probably need to wash it twice to remove all of the oil.

MY COST:
2 TBSP Avocado Oil $1.33
2 Tablespoons Coconut Oil $0.81 cents
2 Tablespoons Coconut Oil $.047 cents
2 Eggs $0.00 The beauty of dating a chicken farmer If you aren’t so lucky, you can add approximately $0.25 to your total
For 1 hair treatment this cost me $2.61 and used 3 ounces of oil. That is $0.87 cents per ounce!

Calling all Cheap Skates
Related Posts:
Homemade Hippie Lip Balm
Homemade Hippie Hair Spray
Homemade Hippie Body Wash
Homemade Hippie Bug Spray
Homemade Hippie Tooth Paste
Homemade Hippie Orange Cleaner
Homemade Hippie Scouring Powder
Homemade Hippie Dishwashing Powder
Homemade Hippie Wrinkle Cream & Eye Cream
Homemade Hippie All Purpose Cleaning Spray
Homemade Hippie Windex for $0.12
Homemade Hippie Mouthwash
Homemade Hippie Face Wash
Homemade Hippie Simple Hand Lotion
A COMPLETE LIST OF HOMEMADE HIPPIE RECIPES
3 Comments
April 7, 2013 at 12:01 AM (Health, Herbal Medicine, Homemade Hippie Beauty Products, How To, Make It Yourself, Non Toxic, Under $1.00, Your Journey to Health)
Tags: alternative medicine, DIY, Essential oil, frugal, Health, herbal medicine, homemade, Magnesium, Non Toxic, restless leg syndrome, Simple

Many of you have inquired about Rob’s restless leg syndrome. For those of you who missed it, the original post is HERE and how to make the Magnesium Oil for cheap is HERE.
I am happy to report that my darling bed-mate is no longer turning the sheets into a tiny ball in the middle of the bed, kicking me in the knee caps, running up and down the stairs in the middle of the night, sitting up in bed and loudly sighing, constantly twitching or flipping around the bed like a fish. My legs are back to being the normal pasty white color, instead of various shades of black, blue and purple. We are both resting well and I am not lying in bed awake dreaming up ways to smother someone more than twice my weight with a pillow. In short, IT WORKED!

Rob has found over the months of trial and error that he does much better if he sprays with magnesium oil twice a day. In the morning before work, he sprays his legs and rubs it in until its dry, then gets dressed and goes about his day, leaving the magnesium oil on his skin. At night about 1/2 an hour before showering he sprays his legs, arms, and torso and rubs it in. He pays special attention and sprays an extra amount along his spine, as he feels that it absorbs better there. Zero scientific proof of that, but he ‘feels’ that it works better so that’s what he does 🙂 Sometimes you just have to listen to your body right? He lays around and lets it soak into his skin for at least 30 minutes, then gets into the shower and gets ready for bed.
I can attest that twice a day is much better than once. He is completely still at night! It’s amazing the difference between Crazy Twitchy Rob and Non-Heebie-Jeebie Rob. I don’t want to strangle the new guy. He’s so nice and peaceful to sleep with that I’ve decided he can stick around 🙂
This program has also turned out to be very affordable. You all haven’t forgotten that I’m a cheapskate have you? We are still using the original 2.2 lb bag of Magnesium Chloride Flakes that I purchased for $14.99. I am happy to report that I have since found an even cheaper source for you HERE at Iherb. This is 2.75 lbs of very pure Magnesium Chloride for only $13.85! IF YOU USE THE COUPON CODE HIF798 YOU WILL RECIEVE A $10 DISCOUNT. PLUS THEY OFFER FREE SHIPPING! YAY!
2 Comments
May 31, 2012 at 1:01 AM (Health, Herbal Medicine, Homemade Hippie Beauty Products, Make It Yourself, Non Toxic, Under $1.00)
Tags: alternative medicine, aromatherapy, beauty, bug spray, DIY, Essential oil, frugal, Frugal Recipes, Health, herbal medicine, Home, homemade, insect repellant, Non Toxic, Simple

In Michigan we are surrounded by water, which causes lots of humidity, which causes mosquitos the size of pterodactyls. For some reason mosquitos love me. Maybe because I am an extremely white, white girl and you can see every vein in my body, which to a mosquito must look like the best all you can eat lunch buffet in town. I also get welts the size of a quarter every time I get bit, so I spend most of the summer looking like a victim of scabies. They have hatched really early this year, because of the crazy warm weather, so it’s time to get out the arsenal and try to fend them off before they start carrying away small children.

The best natural bug repellant I’ve ever used is Bite Blocker by Homs LLC. I have tried several different kinds, but they all seem to wear off after a few minutes. Bite Blocker really works for hours, and doesn’t smell nasty at all. I decided to make my own version of Bite Blocker at home, because the ingredients list is pretty simple.
If you don’t want to make your own it can be purcased HERE. If you use the coupon code HIF798 you will receive a $10 discount and free shipping.
Homemade Hippie Buy Spray
1/4 cup olive oil (or any cheap liquid oil you have laying around)
2 Tbsp vegetable glycerin
1 Tbsp Citric Acid
1/4 cup apple cider vinegar
2 Tbsp homemade vanilla extract
6 drops Lavender essential oil
6 drops Tea Tree essential oil
6 drops Clove Bud essential oil
6 drops Peppermint essential oil
6 drops Rosemary essential oil
6 drops Eucalyptus essential oil
10 drops Geranium essential oil
Mix all ingredients and pour into a spray bottle. Shake before each use. Reapply after 2-3 hours. You can use any strong mixture of essential oils that you prefer, this is just what I had a lot of in the house. I would make sure to use the Geranium oil, because that is the main active ingredient in Bite Blocker. The others I’m sure you could play with and have good results. Let me know what you use!

I have used this a few times so far and it does work very well. Rob and I went to a terribly overgrown area to chop down some dead trees for fire wood. It was way back in the shade, and next to a small creek. Every step we took sent up swarms of mosquitos and I thought for sure we’d be covered in welts. I got one nasty bite on my ankle, through my sock and Rob got zero bites. Considering that we were outside for 2 1/2 hours hauling firewood and sweating profusely I think that is pretty darn good don’t you?
This also smells good, and isn’t offensive to Rob’s manly nostrils, as he doesn’t like to “smell like a flower”.
 Related Posts:
Homemade Hippie Wrinkle Cream
Homemade Hippie Mouthwash
Homemade Hippie Face Wash
Homemade Hippie Hand Lotion
Homemade Hippie Lip Balm
Homemade Hippie Hair Spray
Homemade Hippie Body Wash
Homemade Hippie Tooth Paste
Homemade Hippie Body Lotion
A COMPLETE LIST OF HOMEMADE HIPPIE RECIPES
20 Comments
May 30, 2012 at 1:01 AM (Recipes, Whats for Dinner?)
Tags: bacon, brussels sprouts, Cook, cooking, Easy Recipes, food, Frugal Recipes, Health, Home, homemade, kitchen, Nutrition, real food, Recipes, Salad, Simple

This recipe is very simple, but full of flavor. I love the saltiness of the bacon, the sweetness of the raisins and the bitter brussels sprouts all mixed together. A fabulous side dish!
Brussels Sprouts with Bacon
3 slices thick bacon
4 cups brussels sprouts, trimmed and halved
1/4 cup golden raisins
1 medium shallot, minced
1 Tbsp butter
1/2 cup homemade chicken stock
2 Tbsp apple cider vinegar
sea salt and fresh pepper to taste
- In a heavy skillet, cook bacon until crispy. Remove from pan and set aside to crisp up.
- Add Brussels sprouts to the pan and season with salt and pepper. Cook until well browned and almost soft. About 7 minutes.
- Reduce heat to low and add raisins, shallot and butter. Cook 3 minutes
- Add broth and bring to a boil, being sure to scrape up all the browned bits from the bottom of the pan.
- Reduce heat and simmer broth 1-2 minutes.
- Mix in vinegar and crumbled bacon. Taste and season as needed. Serve warm.
I only had a tiny amount of golden raisins on hand, so I added 1/4 cup of dried cranberries also. It turned out delicious!

I mix mine with lettuce or spinach and eat it like a salad. Yum!
5 Comments
May 25, 2012 at 1:01 AM (Health, Non Toxic, Your Journey to Health)
Tags: Cook, cooking, food, Health, kitchen, Mineral, real food, Salt, Sea salt, seasonings, Simple, Sodium chloride

Hawaiian Deep Sea Salt
Salt has received a lot of press in past years. One minute it is absolutely essential to life, and the next it is giving you hypertension and trying to kill you.
Salt contains sodium, which is necessary for life. It also provides chloride, which produces acid necessary to digest protein. Chloride is also essential to proper brain growth and function. Salt contains magnesium, which is important for many, many functions and is a crucial, but often overlooked mineral. See my post about magnesium here. Salt is important for muscle contraction and expansion, nerve stimulation, and the proper functioning of the adrenal glands. As with any thing on earth, moderation is the key. The body needs 500 mg of sodium per day. Today the average person eats 6,000 to 10,000 mg of sodium per day!
The truth lies in the different types of salt.

Celtic Sea Salt
Table Salt
- Heated to over 1,200 degrees
- Highly processed
- Mined from rock salt beds
- 97.5 sodium chloride
- Added iodine
- Aluminum hydroxide added as a ‘flowing agent’
- Added silicon dioxide and dextrose
- Added fluoride
- Often contains corn sugar to make it more palatable
Sea Salt
- Unrefined
- Unheated
- Extracted from ocean water by evaporation
- High mineral content: potassium, calcium, magnesium, selenium, copper, iron, zinc, and manganese.
- Contains zero additives
- Contains microscopic plant life, which naturally contain iodine
- Contains live enzymes, which aid in digestion

Portugese Sea Salt
I love sea salt, and find the highest quality that I can afford. By far the best tasting salt I’ve ever had is Selina Naturally Hawaiian Sea Salt. It happens to also be the sea salt with the #1 highest mineral content. So if you are looking for my top recommendation, that would be it. (around $24 lb)
Runner up: Celtic Brand Sea Salt, not quite as high in mineral content, but very delicious. ($11.00 lb)
Other high quality sea salts I like are Selina Naturally Portuguese Sea Salt ($8 lb) and Himalayan Sea Salt ($5 lb).
Most other brands I’ve seen marketed as natural sea salt, have such low mineral content that you might as well buy iodized table salt and not bother.

Himalayan Sea Salt
13 Comments
May 16, 2012 at 1:01 AM (Homemade Condiments, Make It Yourself, Recipes, Sugar Free, Whats for Dinner?)
Tags: Bake, baking, Barbecue sauce, casserole, chicken, Coconut oil, Cook, cooking, DIY, easy, Easy Recipes, food, frugal, Frugal Recipes, Health, Home, homemade, homemade condiments, kitchen, low carb, no carb, Nutrition, paleo, Pork, real food, recipe, Recipes, Simple, sugar free

It is grilling season, so it’s time to whip up my secret weapon. I have been adapting and changing this recipe for so many years that I don’t remember what I originally started with. All I remember is that I had a half used can of tomato paste in the fridge I was trying to get rid of, and this recipe was somehow born. I love that it has no sugar, but still tastes sweet and has this great spicy kick that goes well with just about any meat. I also really love the base of nourishing bone broth, which you can never have too much of. Tonight we’re grilling bone-in pork ribs from our local farmer with some cornbread. Mmmm, I’m getting hungry just thinking about it!
The Worlds Best Barbeque Sauce
makes 2 cups
1 Tbsp grass-fed butter or coconut oil
1 cup sweet onion, diced small
1 Tbsp soy sauce
3-4 cloves of garlic, minced
1 tsp cumin
1 tsp dry mustard powder
1 tsp oregano
1 tsp basil
1 tsp chipotle chili powder
1 Tbsp chili powder
1 can (6 oz) tomato paste
1 1/2 cups homemade chicken stock (or beef or vegetable)
2 Tbsp apple cider vinegar
1/2-1 tsp stevia powder (or sweetener of choice)
Heat butter/oil in sauce pan and sauté onion for 3-4 minutes until translucent. Add all remaining ingredients and bring to a boil. You can serve it just like this, but I like to boil it down to thicken it a while. I turn down the heat, cover the pan and let it simmer for 20 minutes or so. I also find the longer cooking time melds the flavors, and it turns out even more delicious.

I have used this sauce on every cut of pork, beef and chicken that I can think of. It is a great marinade, basting sauce, oven baking glaze and dipping sauce. If you are feeding young kids or someone who doesn’t like spicy food you may want to add the chili powder a little bit at a time and taste as you go.
If you want to make this even healthier, you could let it cool and add 2 tbsp of whey and leave it on the counter over night. Then you would have a sugar-free probiotic condiment.
This keeps for 3 weeks in the fridge, and also freezes very well. If you eat as much meat as we do, it won’t last you that long 🙂
Related Posts:
Coffee Spice Rub
Tender Grilled Brisket
Real Food Taco Soup (in the crockpot)
Real Food Chili (in the crockpot)
Real Food Lasagna (SO Simple)
Stuffed Green Peppers in the Crockpot
Country Fried Steak
Real Food Meatloaf
The Worlds Best Chimichangas!!
COMPLETE LIST OF REAL FOOD RECIPES
59 Comments
May 15, 2012 at 1:01 AM (Fast, Make It Yourself, Recipes, Simple)
Tags: Butter, Coconut oil, Cook, easy, Easy Recipes, food, frugal, Frugal Recipes, Home, homemade, how to, kitchen, Nutrition, Popcorn, real food, recipe, Simple, tutorials
This is almost too easy to post about, but it’s one of our favorite snacks, so I thought I’d share. You can use coconut oil, or butter or a mixture of the two. I like a mixture, but that is totally up to your taste buds! This is a large recipe, because for some reason this doesn’t go stale like other recipes I’ve tried. I pack a bag in my lunch and eat it cold the next day. If you want just a small, easy snack 2 Tbsp of dry popcorn kernels make 1 Quart of popcorn.
Coconut Oil Popcorn
makes about 2 1/2 quarts (10 cups)
1/3 cup organic popcorn kernels
3 Tbsp coconut oil
2 Tbsp grass-fed butter
salt to taste
I use a very heavy bottomed, stainless steel stock pot with a lid for this recipe. I think just about any heavy pot will do (including heave frying pans).
Place coconut oil, popcorn kernels and butter in pot. Turn heat to medium-high and place lid on pot. Every 10 seconds or so shake the pot to avoid burnt popcorn. Once the popcorn starts to pop, you can stop shaking. There will be a fast burst of popping, after that turn off the heat and let it finish popping. Remove lid and add salt to taste.

butter, coconut oil and organic popcorn in pot. Medium high heat.
I have made this many times and have never had burnt popcorn or un-popped kernels in the bottom of the pot. We eat a lot right away, and then store the left overs in sandwich bags for lunch or snacks.

Empty pot, no burned or un-popped kernels.
Other popcorn flavor ideas that I plan to try:
Grated Parmesan cheese
Italian seasonings (basic, oregano, parsley)
Salt & Vinegar
Lemon pepper
Tabasco sauce
Celery salt & Dill
Garlic Butter
Homemade taco seasoning
What are your ideas?
22 Comments
May 14, 2012 at 1:01 AM (Real Food Dessert, Recipes, Sugar Free)
Tags: Bake, baking, Banana, Coconut, Coconut milk, Coconut oil, Cook, cooking, dessert, DIY, easy, Easy Recipes, food, frugal, Frugal Recipes, Health, Home, homemade, housekeeping, kitchen, Nutrition, real food, Recipes, Simple, Vanilla extract

I have made this as a dessert and omitted the sweetener and served it for breakfast. It is delicious either way. It tastes great warm or cold and is full of healthy fats, omega-3’s and protein.
Coconut Banana Custard
1 1/2 cups coconut milk powder (I buy mine from Wilderness Family Naturals)
4 cups very hot water
4 over-ripe bananas, mashed
8 free-range soy-free eggs (why soy free?)
2 Tbsp homemade vanilla extract
1/2 cup maple syrup (or sweetener of choice)
3 tsp cinnamon
1/4 tsp sea salt
Mix coconut milk powder and hot water. Whisk until smooth. Add all remaining ingredients and blend. Pour into a 11×13 casserole dish. Set the casserole dish into a larger pan filled with water. Bake in 350 degree oven for 55-65 minutes. Do not over-bake! Custard sets as it cools, and even more in the fridge. If cooked too long, the liquid will separate from the eggs, and it will turn out like a sweetened scrambled egg, with a bunch of excess liquid. You are looking for the edges to set, but the middle to slightly jiggle when you bump the pan. For the perfect custard, let it cool in the water bath for at least 30 minutes, then cover the dish with plastic wrap and chill in the fridge for 4 or more hours.
This can also be baked in individual ramekins or glass Pyrex dishes (for 35 minutes each). Pyrex dishes are very convenient if you’re planning to pack this in your lunch. You can just let it cool completely and snap on the lid and you’re all set.

I have made this with no sweetener before and it is delicious that way as well. It comes out slightly sweet and more eggy tasting and makes a great breakfast hot or cold.
You can use canned coconut milk (or make your own fresh), but I find it cheaper to use the powder.
For a more beautiful presentation, after the custard is finished baking place a layer of banana slices (or coconut flakes) on top and place under a hot broiler for 3-4 minutes. The bananas will carmelize and blacken and look beautiful on the plate.
7 Comments
May 12, 2012 at 1:01 AM (Buying in Bulk, Recipes, Simple, Whats for Dinner?)
Tags: Bake, Baked beans, baking, casserole, Cook, cooking, crock pot, easy, Easy Recipes, food, frugal, Frugal Recipes, Health, Home, homemade, kitchen, Nutrition, Oven, real food, recipe, Recipes, Simple, Slow cooker

Baked Beans in the Crock Pot
This makes 1 quart of beans
1 cup dry kidney, navy or pinto beans soaked (see below)
2 sweet, yellow onions, chopped fine
1/2 cup raw maple syrup (or brown sugar)
1/4 cup molasses
1/3 cup organic or homemade ketchup
1 tsp salt
1 1/2 tsp dry mustard powder
1/2 tsp pepper
1/2 lb bacon (from pasture raised pigs)
To soak the beans: Place beans in large bowl or pot, cover with 1 quart of very warm water (110-130 degrees). Soak for 8-24 hours. I put mine in the oven with the pilot light and oven light on, to keep them toasty. They next day, drain the beans and rinse.
Place beans and all other ingredients EXCEPT SALT in the crockpot, laying the bacon across the top. Adding salt to dry beans, keeps them from getting soft. Always add salt to beans after cooking. Cook on low for 4-6 hours.

These are very good and very filling. I serve them with fresh cornbread right out of the oven and we usually eat way too much. This recipe freezes and reheats very well. I have made a quadruple batch before and froze it in individual containers (back when I had a chest freezer, geez I miss that!).
3 Comments
May 11, 2012 at 1:01 AM (Almost Free, Fast, Make It Yourself, Recipes, Simple, Under $1.00)
Tags: Bake, baking, bread, Cook, cooking, Crouton, DIY, easy, Easy Recipes, food, frugal, Frugal Recipes, housekeeping, kitchen, Nutrition, real food, recipe, Recipes, Salad, Simple, sourdough

Salad season is a lot of fun for me this year. I am having a blast coming up with all sorts of salad dressing and fun creations. But what is a salad without a crunchy, salty, buttery crouton? I had Rob time me, and these took exactly 3 minutes and 4 seconds to prepare, and 9 minutes to bake in the oven. Now, that’s what I call fast food! (and a great use for stale bread).
Homemade Garlic Butter Croutons
1 Tbsp Butter
2 Tbsp Olive Oil
2 Cloves garlic, crushed
salt and pepper
Dash of basil, thyme or parsley for color (totally optional)
4 slices bread, cubed
Preheat the oven to 425. Heat butter, olive oil and garlic in a skillet. Cube some stale bread (I used whole wheat sourdough, but whatever you have around will work) and throw it in the pan. Toss the bread around and stir to coat. Sprinkle with salt and pepper. Spread onto a cookie sheet and bake for 9-10 minutes. Let them cool completely and store in an airtight container. They will keep for 2-3 months.

3 Comments
« Older entries


