January 12, 2014 at 1:09 AM (Grilling, Homemade Condiments, Homemade Seasoning Mixes, Recipes, Whats for Dinner?)
Tags: cajun, cooking, DIY, Easy Recipes, frugal, Health, homemade, kitchen, Meat, Nutrition, organic, paleo, real food, recipe, seafood, seasoning mix
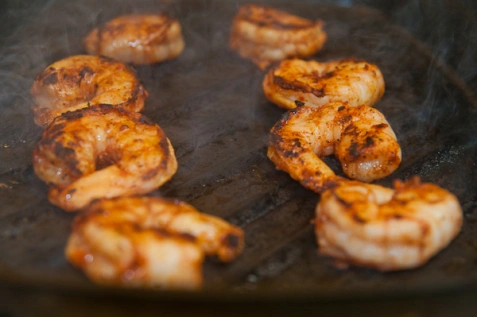
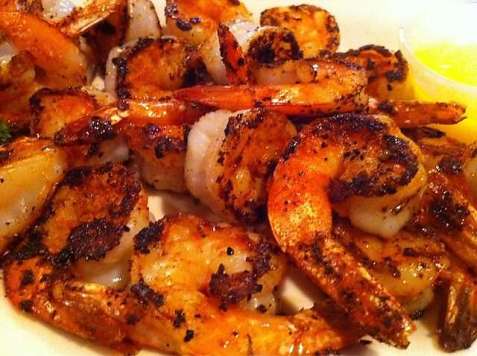
Cajun Spice Mix
- 1 Tbsp Sea Salt
- 1 Tbsp Fresh Ground Black Pepper
- 1 Tbsp Fresh Ground White Pepper
- 1 Tbsp Oregano
- 1 Tbsp Thyme
- 1 Tbsp Basil
- 1 Tbsp Sugar
- 2 Tbsp Cayenne
- 2 Tbsp Paprika
- 2 Tbsp Chili Powder
- 2 Tbsp Garlic Powder
- 2 Tbsp Onion Powder
Mix all ingredients together and store in an airtight container. I always make spice mixes in large quantities, because I cook more than the average bear. Feel free to halve or quarter this recipe if you aren’t a slave to your kitchen like I am 😉
This is good on a whole lot of foods, but will blow your mind on seafood. Grilled Cajun Shrimp anyone? Why not try it with Homemade Cocktail Sauce?
Related Posts:
Worlds Best BBQ Sauce (sugar free)
Homemade Worcestershire Sauce
Tender Grilled Brisket
Homemade Probiotic Teriyaki Sauce
Cajun Smothered Pork Chops (Robs Favorite!)
Recipe Index
7 Comments
April 8, 2013 at 12:01 AM (Beverages, Fast, Recipes, Simple, Sugar Free, Whats for Breakfast?)
Tags: cancer, candida cleanse, candida diet, Coconut oil, Cook, cooking, diet, DIY, easy, Easy Recipes, food, Frugal Recipes, fungus, Health, kitchen, paleo, real food, smoothie

Breakfast is tricky for me. I am not hungry in the morning! I know it’s supposed to be this big healthy meal full of protein and fabulous vitamins to start the day off, but quite frankly at 7am I am too tired to chew. I also love to sleep! So I wake up at the last possible second. If I am to eat a ‘proper’ breakfast, I would have to wake up earlier in order to prepare it. Realistically, in the actual life of me…..not going to happen.
So I have resorted over the years to either a piece of fruit in the car while I’m driving to work, or a smoothie. Since I am erradicating all Candida from my life for this experiement, I can no long have fruit sugars. According to the experts I’m allowed to eat only the following fruits:
- Berries
- Grapefruit
- Lemon
- Lime
- Green Apples
- Avocado
- Fresh Coconut
Part of me is tempted just to throw every one of those fruits into a blender and call that a smoothie, but that would be WAY too much fruit sugar all at once. So I add as much protein as I can. I have noticed that this keeps me full for a very long time. I normally take a lunch hour around 1pm, and this satisfies until then for sure!
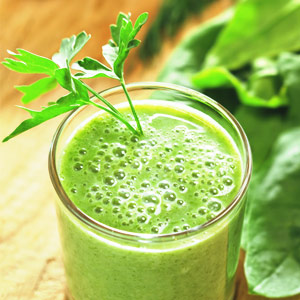
Green Apple Smoothie
1 Large Green Apple- seeded & cored (if your blender is a little on the wimpy side you may want to peel it as well)
5 medium carrots
1 cup homemade yogurt
2 raw eggs*
1 cup greens (not Kale, not making that mistake again)
1 Tbsp coconut oil
Directions:
- Put it all in the blender, duh
- Pour it in a glass and get in the car and go to work! Hurry up you have 1 minute and 8 seconds to be out the door!
- * I wouldn’t consume the average commerically farmed egg raw. That shit will kill you. I am lucky to be madly in love with a chicken farmer, who grows me organic, completely free-range and soy-free eggs (why soy free you ask? READ THIS). They are bright orange-yolked bundles of goodness, full of Omega 3’s and all 23 essential amino acids. Really, the perfect food. You should find yourself such a source and eat raw eggs until the cows come home. Or the chickens in this case.
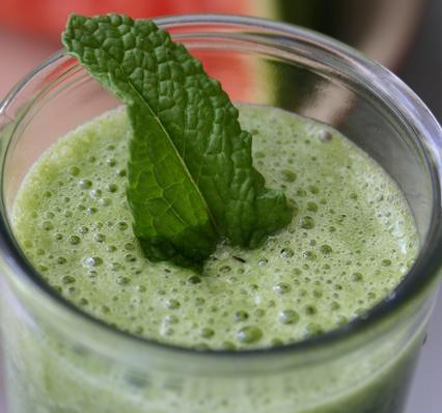 What does it taste like you ask? It tastes mildly sweet and very creamy with a bit of tartness from the yogurt and the apple. You could probably sweeten it with Stevia or something, but I like it just fine as is. But I’m weird so…
Related Articles:
Is Cancer a Fungus?
Is Candida Overgrowth a Real Problem?
The Easiest Cancer Cure in the World?
Heat Free Homeade Yogurt!
How to Make Yogurt in the Crock Pot
Real Food Recipes
3 Comments
April 6, 2013 at 12:01 AM (Ferments, Homemade Seasoning Mixes, Recipes, Whats for Dinner?)
Tags: Cook, cooking, easy, Easy Recipes, Frugal Recipes, homemade, kitchen, Nutrition, real food, recipe, Salad, Venison

Taco Salad for the Candida Free Kitchen
2/3 Cup Quinoa
1 Cup homemade Bone Broth
1 lb ground turkey/chicken/beef/venison etc
2-4 Tbsp homemade Taco Seasoning
Romaine or iceberg Lettuce
Olives
Diced Onions
Green Chilies
Grape or Cherry Tomatoes
Sliced avocado
homemade Salsa Verde or ‘green sauce” as Rob likes to call it.
- Bring bone broth to a boil, add quinoa and simmer until tender
- Brown ground meat
- Add cooked quinoa, and homemade taco seasoning. Adding more broth if mixture is too dry
- Allow mixture to cool slightly
- Toss mixture with all remaining ingredients to make salad.
- Top with homemade yogurt if desired.
We love this meal. Something about the still slightly warm meat mixture and the crunchy cold lettuce. Yum! Plus it is “Phase One” safe, if you are following a Candida free way of life, or just plain trying to eat more vegetables!
1 Comment
May 30, 2012 at 1:01 AM (Recipes, Whats for Dinner?)
Tags: bacon, brussels sprouts, Cook, cooking, Easy Recipes, food, Frugal Recipes, Health, Home, homemade, kitchen, Nutrition, real food, Recipes, Salad, Simple

This recipe is very simple, but full of flavor. I love the saltiness of the bacon, the sweetness of the raisins and the bitter brussels sprouts all mixed together. A fabulous side dish!
Brussels Sprouts with Bacon
3 slices thick bacon
4 cups brussels sprouts, trimmed and halved
1/4 cup golden raisins
1 medium shallot, minced
1 Tbsp butter
1/2 cup homemade chicken stock
2 Tbsp apple cider vinegar
sea salt and fresh pepper to taste
- In a heavy skillet, cook bacon until crispy. Remove from pan and set aside to crisp up.
- Add Brussels sprouts to the pan and season with salt and pepper. Cook until well browned and almost soft. About 7 minutes.
- Reduce heat to low and add raisins, shallot and butter. Cook 3 minutes
- Add broth and bring to a boil, being sure to scrape up all the browned bits from the bottom of the pan.
- Reduce heat and simmer broth 1-2 minutes.
- Mix in vinegar and crumbled bacon. Taste and season as needed. Serve warm.
I only had a tiny amount of golden raisins on hand, so I added 1/4 cup of dried cranberries also. It turned out delicious!

I mix mine with lettuce or spinach and eat it like a salad. Yum!
5 Comments
May 28, 2012 at 1:01 AM (Recipes, Simple, Whats for Dinner?)
Tags: Bake, baking, casserole, Cook, cooking, Easy Recipes, fish, food, Frugal Recipes, Health, Home, homemade, kitchen, morel, Nutrition, real food, sea food, trout

Any fish will work for this recipe. Just pick your favorite fillet and go with it. We just happened to have a huge lake trout in the freezer, so this is what I used. It is finally mushroom season, and morels are my favorite. Time to stock up!
Lake Trout with Morels
1 lb fish fillets 1/2 to 3/4 thick
2 Tbsp butter
1 1/2 cups fresh mushrooms, sliced
1/3 cup green onion, sliced
Sea salt
1 tsp fresh thyme, or 1/4 tsp dry thyme
- Thaw fish if frozen. Pat dry and place in baking dish. Sprinkle with sea salt.
- In a saucepan melt butter and add mushrooms, onions and thyme. Cook until tender.
- Pour over fish and bake in 450 degree oven for 12-18 minutes. Fish should flake easily with a fork when done.
 If you are lucky enough to have a surplus of morels this year there are many ways to preserve them. I have tried just about everything, and several methods work.
1. I thoroughly rinse the mushrooms in cold water. Then sauté in butter for no longer than 3 minutes. Let cool and place in a zip lock baggie with juices from pan. When you are ready to eat, cut off the plastic bag and place the whole frozen block in a skillet. Cover and cook on low. Tastes just like fresh, with a slight difference in firmness and texture.
2. I have dried them on a string in the attic for a month, I have laid them on the oven rack and dried them at 160 degrees for about an hour. I have laid them on window screens out in the back yard until dry. I have never owned a dehydrator, so that’s the only method I haven’t used. Of everything I’ve tried, threading them onto a string (like a little mini-clothes line) was by far the best. When rehydrated the taste and texture was exactly the same as fresh out of the ground. Maybe because no heat is used?
3. I have washed and drained the mushrooms so they are almost dry. Then laid them on a cookie sheet and placed them in the freezer until solid. Pack into bags and vacuüm seal. This method changed the texture a bit, but the flavor was the same.
4. My least favorite method was packing a mason jar (or other freezer container) with mushrooms, covering that with cold water and freezing. They would be ok for soup, but the texture was too mushy for my tastes. And a lot of the flavor gets dumped out with the water after thawing.
Happy mushroom hunting!

3 Comments
May 27, 2012 at 1:01 AM (Baking, Recipes, Whats for Breakfast?, Whats for Dinner?)
Tags: Asparagus, Bake, baking, casserole, Cook, Easy Recipes, food, Frugal Recipes, Health, Home, homemade, kitchen, Nutrition, real food, Recipes

This is an easy make-ahead breakfast. You can mix it up the night before and then bake it the next morning. It also makes a fast and easy dinner.
Ham & Asparagus Strata
4 English muffins, torn into pieces
2 cups cooked ham
2 cups fresh asparagus, cut up
4-6 oz Gruyère cheese, cubed
5 eggs, beaten
1/3 cup sour cream
1 1/2 cups milk
2 Tbsp onion, finely chopped
1 Tbsp Dijon mustard
1/2 tsp fresh black pepper
- Grease a 2 quart casserole dish. Spread half of the english muffin pieces on the bottom.
- Top with ham, asparagus and cheese cubes
- Top with remaining english muffin pieces
- In a bowl, whisk together eggs, sour cream, milk, onion, mustard and pepper
- Pour this mixture over casserole dish, coating everything evenly
- Cover and chill for 2 to 24 hours
- Bake, uncovered at 325 degrees for 60-65 minutes
 There are a zillion variations on this recipe. I have replaced the ham with chicken before. I have used broccoli instead of asparagus. I have used swiss instead of Gruyère. Let your imagination go wild!
2 Comments
May 16, 2012 at 1:01 AM (Homemade Condiments, Make It Yourself, Recipes, Sugar Free, Whats for Dinner?)
Tags: Bake, baking, Barbecue sauce, casserole, chicken, Coconut oil, Cook, cooking, DIY, easy, Easy Recipes, food, frugal, Frugal Recipes, Health, Home, homemade, homemade condiments, kitchen, low carb, no carb, Nutrition, paleo, Pork, real food, recipe, Recipes, Simple, sugar free

It is grilling season, so it’s time to whip up my secret weapon. I have been adapting and changing this recipe for so many years that I don’t remember what I originally started with. All I remember is that I had a half used can of tomato paste in the fridge I was trying to get rid of, and this recipe was somehow born. I love that it has no sugar, but still tastes sweet and has this great spicy kick that goes well with just about any meat. I also really love the base of nourishing bone broth, which you can never have too much of. Tonight we’re grilling bone-in pork ribs from our local farmer with some cornbread. Mmmm, I’m getting hungry just thinking about it!
The Worlds Best Barbeque Sauce
makes 2 cups
1 Tbsp grass-fed butter or coconut oil
1 cup sweet onion, diced small
1 Tbsp soy sauce
3-4 cloves of garlic, minced
1 tsp cumin
1 tsp dry mustard powder
1 tsp oregano
1 tsp basil
1 tsp chipotle chili powder
1 Tbsp chili powder
1 can (6 oz) tomato paste
1 1/2 cups homemade chicken stock (or beef or vegetable)
2 Tbsp apple cider vinegar
1/2-1 tsp stevia powder (or sweetener of choice)
Heat butter/oil in sauce pan and sauté onion for 3-4 minutes until translucent. Add all remaining ingredients and bring to a boil. You can serve it just like this, but I like to boil it down to thicken it a while. I turn down the heat, cover the pan and let it simmer for 20 minutes or so. I also find the longer cooking time melds the flavors, and it turns out even more delicious.

I have used this sauce on every cut of pork, beef and chicken that I can think of. It is a great marinade, basting sauce, oven baking glaze and dipping sauce. If you are feeding young kids or someone who doesn’t like spicy food you may want to add the chili powder a little bit at a time and taste as you go.
If you want to make this even healthier, you could let it cool and add 2 tbsp of whey and leave it on the counter over night. Then you would have a sugar-free probiotic condiment.
This keeps for 3 weeks in the fridge, and also freezes very well. If you eat as much meat as we do, it won’t last you that long 🙂
Related Posts:
Coffee Spice Rub
Tender Grilled Brisket
Real Food Taco Soup (in the crockpot)
Real Food Chili (in the crockpot)
Real Food Lasagna (SO Simple)
Stuffed Green Peppers in the Crockpot
Country Fried Steak
Real Food Meatloaf
The Worlds Best Chimichangas!!
COMPLETE LIST OF REAL FOOD RECIPES
59 Comments
May 15, 2012 at 1:01 AM (Fast, Make It Yourself, Recipes, Simple)
Tags: Butter, Coconut oil, Cook, easy, Easy Recipes, food, frugal, Frugal Recipes, Home, homemade, how to, kitchen, Nutrition, Popcorn, real food, recipe, Simple, tutorials
This is almost too easy to post about, but it’s one of our favorite snacks, so I thought I’d share. You can use coconut oil, or butter or a mixture of the two. I like a mixture, but that is totally up to your taste buds! This is a large recipe, because for some reason this doesn’t go stale like other recipes I’ve tried. I pack a bag in my lunch and eat it cold the next day. If you want just a small, easy snack 2 Tbsp of dry popcorn kernels make 1 Quart of popcorn.
Coconut Oil Popcorn
makes about 2 1/2 quarts (10 cups)
1/3 cup organic popcorn kernels
3 Tbsp coconut oil
2 Tbsp grass-fed butter
salt to taste
I use a very heavy bottomed, stainless steel stock pot with a lid for this recipe. I think just about any heavy pot will do (including heave frying pans).
Place coconut oil, popcorn kernels and butter in pot. Turn heat to medium-high and place lid on pot. Every 10 seconds or so shake the pot to avoid burnt popcorn. Once the popcorn starts to pop, you can stop shaking. There will be a fast burst of popping, after that turn off the heat and let it finish popping. Remove lid and add salt to taste.

butter, coconut oil and organic popcorn in pot. Medium high heat.
I have made this many times and have never had burnt popcorn or un-popped kernels in the bottom of the pot. We eat a lot right away, and then store the left overs in sandwich bags for lunch or snacks.

Empty pot, no burned or un-popped kernels.
Other popcorn flavor ideas that I plan to try:
Grated Parmesan cheese
Italian seasonings (basic, oregano, parsley)
Salt & Vinegar
Lemon pepper
Tabasco sauce
Celery salt & Dill
Garlic Butter
Homemade taco seasoning
What are your ideas?
22 Comments
May 14, 2012 at 1:01 AM (Real Food Dessert, Recipes, Sugar Free)
Tags: Bake, baking, Banana, Coconut, Coconut milk, Coconut oil, Cook, cooking, dessert, DIY, easy, Easy Recipes, food, frugal, Frugal Recipes, Health, Home, homemade, housekeeping, kitchen, Nutrition, real food, Recipes, Simple, Vanilla extract

I have made this as a dessert and omitted the sweetener and served it for breakfast. It is delicious either way. It tastes great warm or cold and is full of healthy fats, omega-3’s and protein.
Coconut Banana Custard
1 1/2 cups coconut milk powder (I buy mine from Wilderness Family Naturals)
4 cups very hot water
4 over-ripe bananas, mashed
8 free-range soy-free eggs (why soy free?)
2 Tbsp homemade vanilla extract
1/2 cup maple syrup (or sweetener of choice)
3 tsp cinnamon
1/4 tsp sea salt
Mix coconut milk powder and hot water. Whisk until smooth. Add all remaining ingredients and blend. Pour into a 11×13 casserole dish. Set the casserole dish into a larger pan filled with water. Bake in 350 degree oven for 55-65 minutes. Do not over-bake! Custard sets as it cools, and even more in the fridge. If cooked too long, the liquid will separate from the eggs, and it will turn out like a sweetened scrambled egg, with a bunch of excess liquid. You are looking for the edges to set, but the middle to slightly jiggle when you bump the pan. For the perfect custard, let it cool in the water bath for at least 30 minutes, then cover the dish with plastic wrap and chill in the fridge for 4 or more hours.
This can also be baked in individual ramekins or glass Pyrex dishes (for 35 minutes each). Pyrex dishes are very convenient if you’re planning to pack this in your lunch. You can just let it cool completely and snap on the lid and you’re all set.

I have made this with no sweetener before and it is delicious that way as well. It comes out slightly sweet and more eggy tasting and makes a great breakfast hot or cold.
You can use canned coconut milk (or make your own fresh), but I find it cheaper to use the powder.
For a more beautiful presentation, after the custard is finished baking place a layer of banana slices (or coconut flakes) on top and place under a hot broiler for 3-4 minutes. The bananas will carmelize and blacken and look beautiful on the plate.
7 Comments
May 12, 2012 at 1:01 AM (Buying in Bulk, Recipes, Simple, Whats for Dinner?)
Tags: Bake, Baked beans, baking, casserole, Cook, cooking, crock pot, easy, Easy Recipes, food, frugal, Frugal Recipes, Health, Home, homemade, kitchen, Nutrition, Oven, real food, recipe, Recipes, Simple, Slow cooker

Baked Beans in the Crock Pot
This makes 1 quart of beans
1 cup dry kidney, navy or pinto beans soaked (see below)
2 sweet, yellow onions, chopped fine
1/2 cup raw maple syrup (or brown sugar)
1/4 cup molasses
1/3 cup organic or homemade ketchup
1 tsp salt
1 1/2 tsp dry mustard powder
1/2 tsp pepper
1/2 lb bacon (from pasture raised pigs)
To soak the beans: Place beans in large bowl or pot, cover with 1 quart of very warm water (110-130 degrees). Soak for 8-24 hours. I put mine in the oven with the pilot light and oven light on, to keep them toasty. They next day, drain the beans and rinse.
Place beans and all other ingredients EXCEPT SALT in the crockpot, laying the bacon across the top. Adding salt to dry beans, keeps them from getting soft. Always add salt to beans after cooking. Cook on low for 4-6 hours.

These are very good and very filling. I serve them with fresh cornbread right out of the oven and we usually eat way too much. This recipe freezes and reheats very well. I have made a quadruple batch before and froze it in individual containers (back when I had a chest freezer, geez I miss that!).
3 Comments
« Older entries


